Overview
Webhooks allow you to receive real-time notifications when push notification events occur in Clix. Instead of repeatedly polling for updates, Clix will automatically send HTTP POST requests to your specified endpoint whenever a push notification is sent or fails. This integration enables you to:- Track delivery status of push notifications in real-time
- Sync notification data with your internal systems
- Build custom analytics and monitoring dashboards
- Trigger automated workflows based on notification events
Prerequisites
Before setting up webhooks, ensure you have:- An accessible HTTPS endpoint that can receive POST requests
- Proper authentication/authorization configured on your endpoint (if needed)
- A Clix project with appropriate permissions
Webhook endpoints must be publicly accessible. If your endpoint is behind a
firewall, you’ll need to whitelist Clix’s IP addresses.
Setting Up a Webhook
Step 1: Navigate to Webhook Settings
Go to your project settings and select the Webhook tab.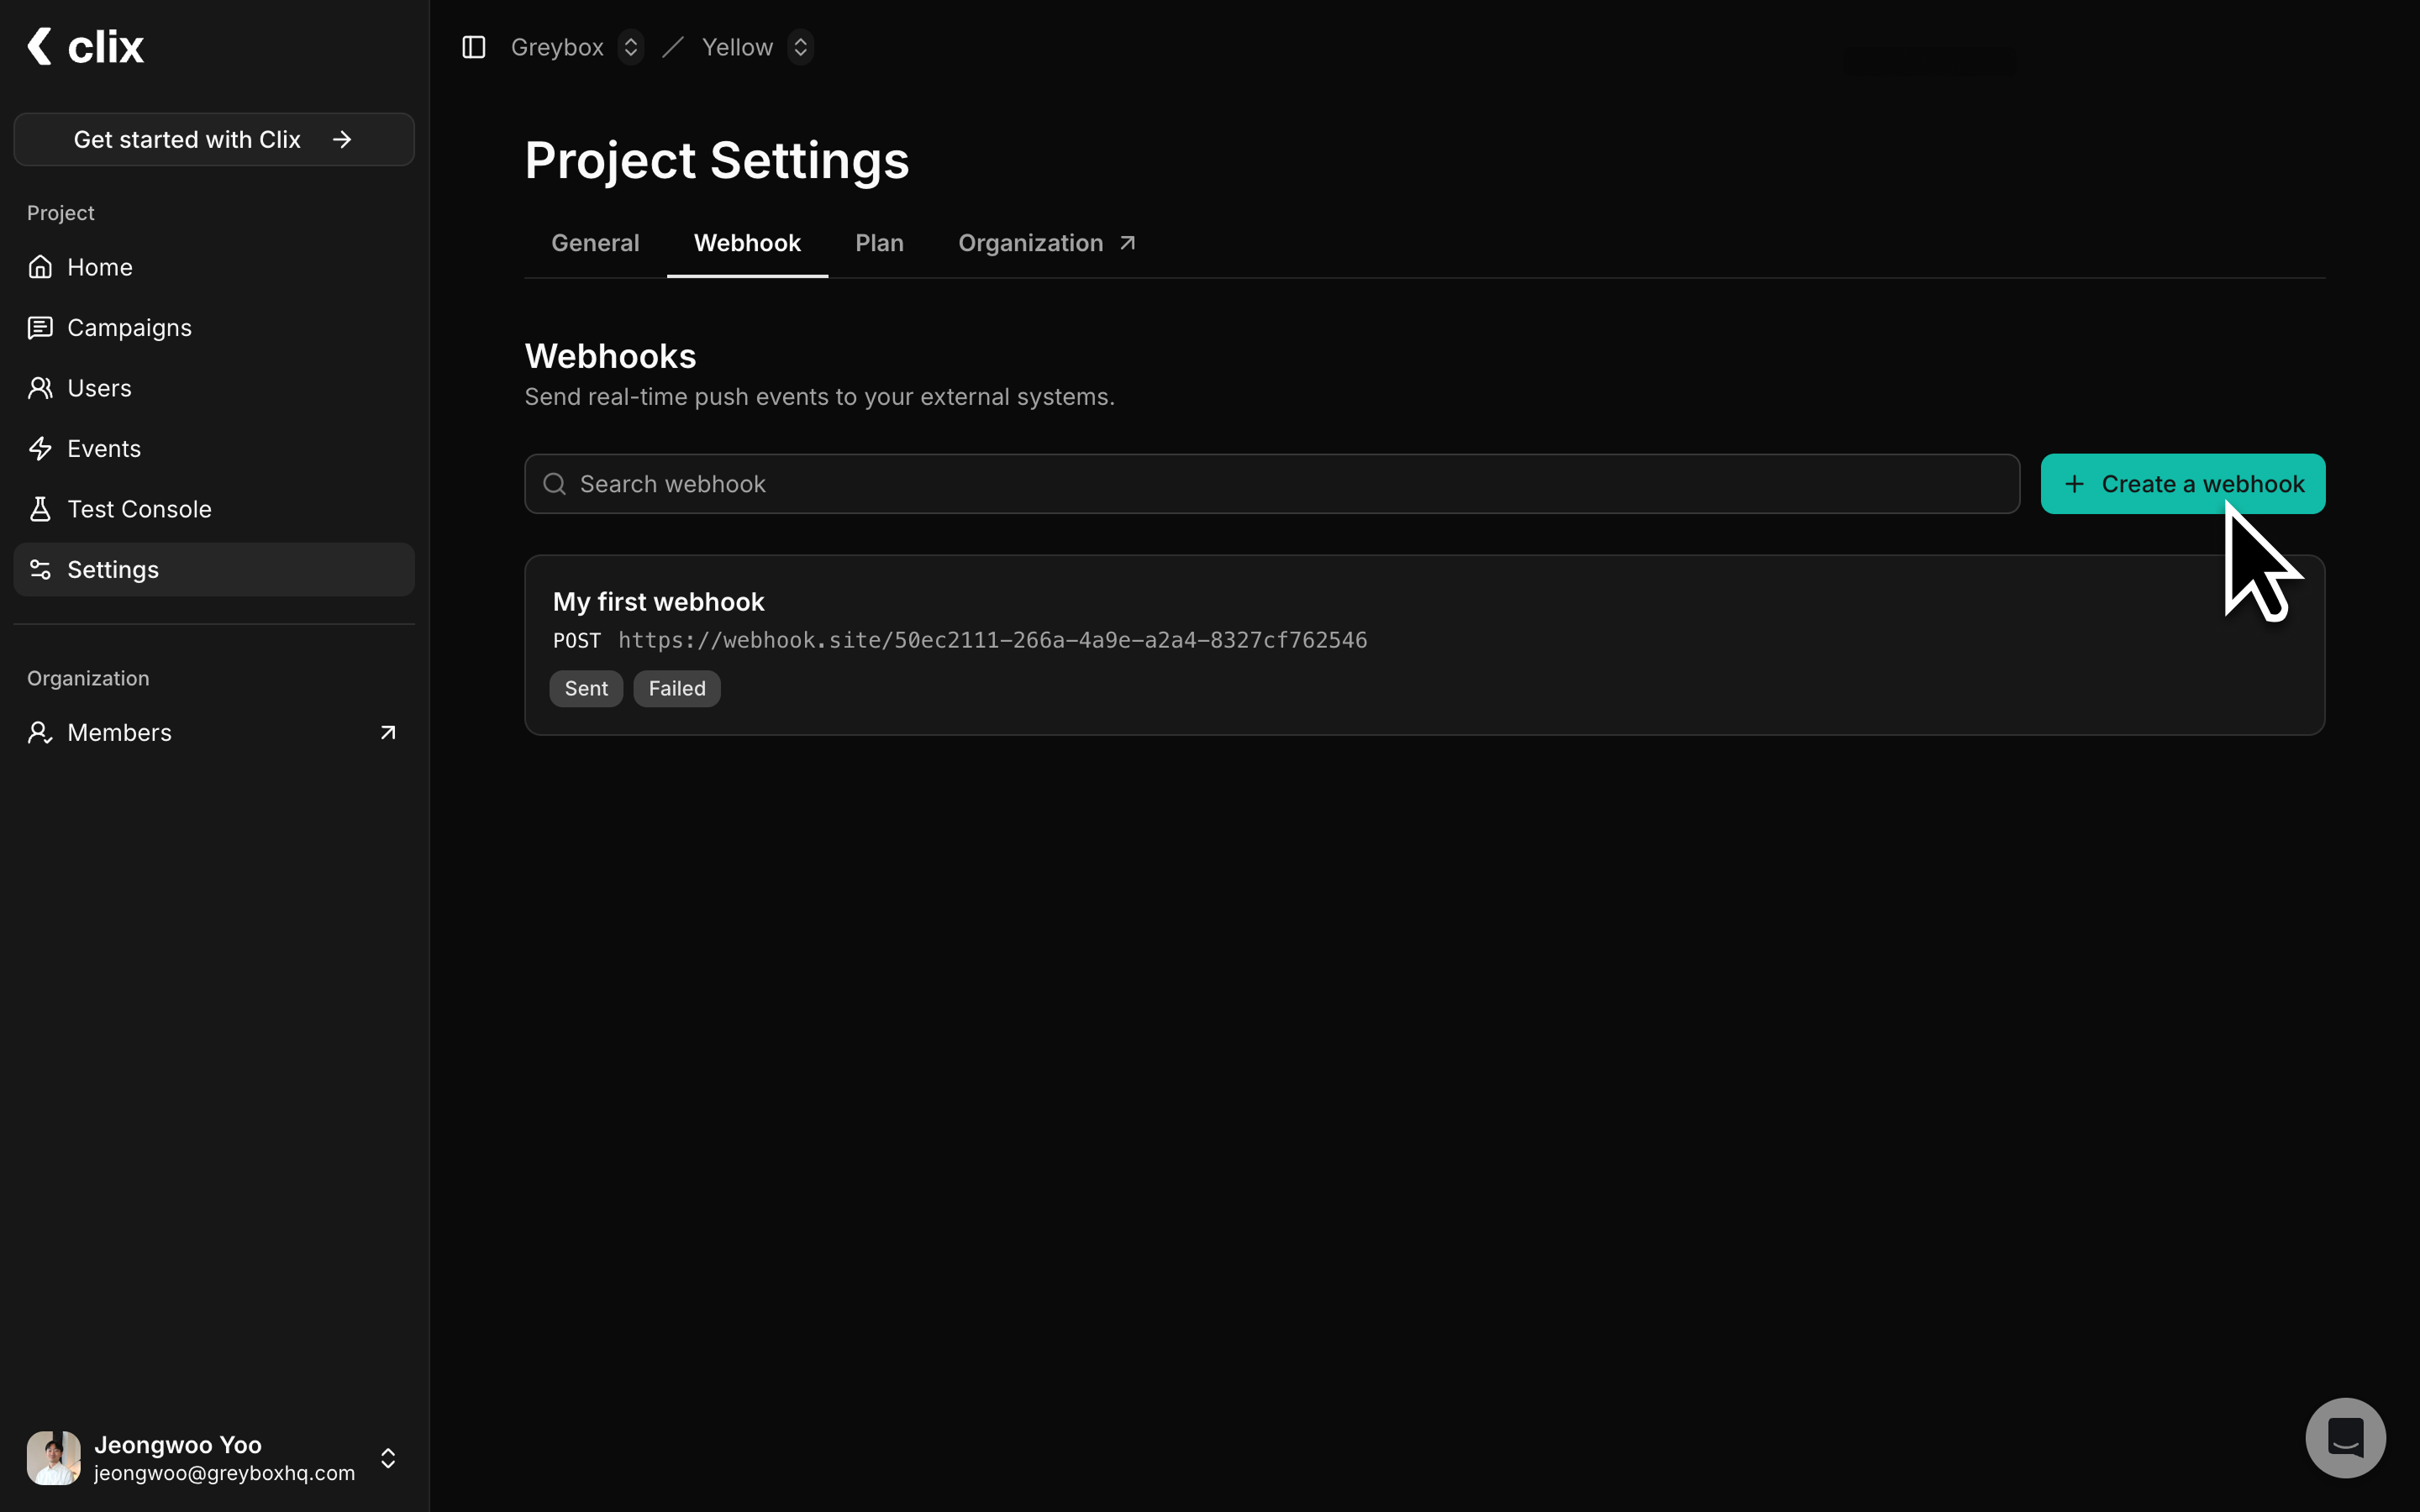
Step 2: Create a New Webhook
Click the “Create a webhook” button to open the webhook configuration dialog.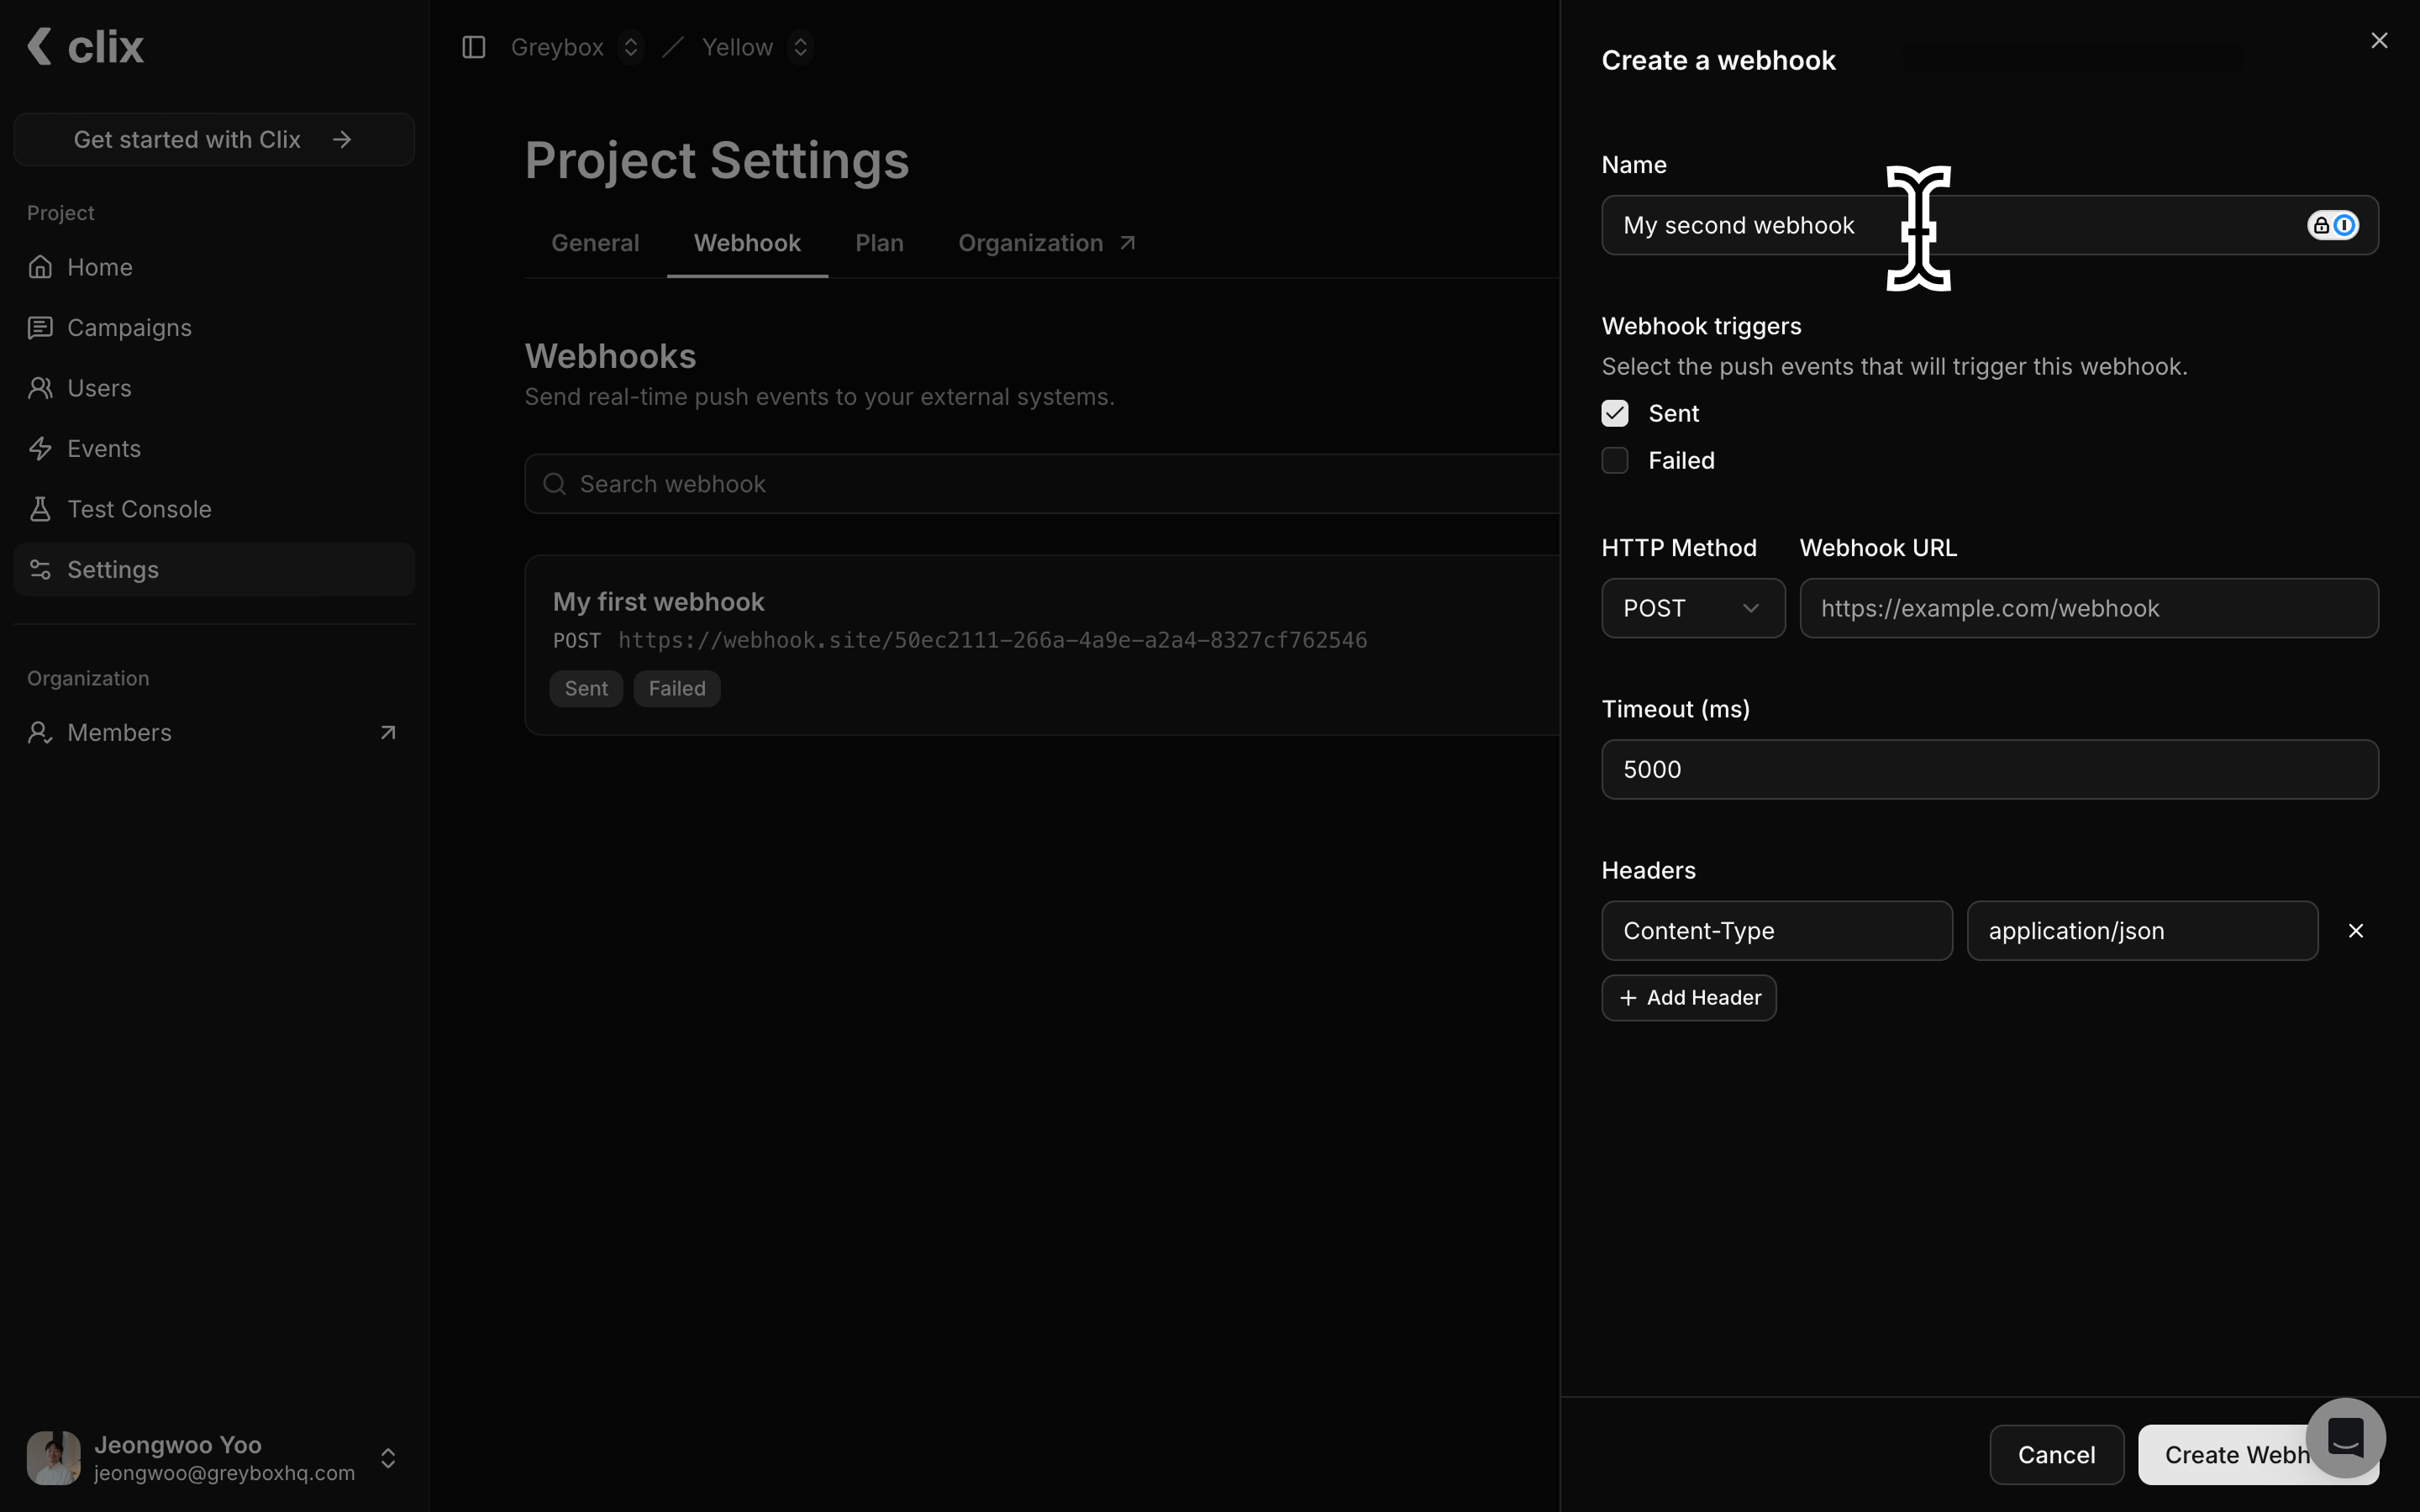
Webhook Name
Enter a descriptive name to identify this webhook (e.g., “Production Analytics Webhook”).
Webhook Triggers
Select which push notification events should trigger this webhook:
- Sent: Triggered when a push notification is successfully delivered to the device
- Failed: Triggered when a push notification fails to be delivered
HTTP Configuration
Configure the HTTP request details:
- HTTP Method: Currently supports POST
- Webhook URL: Enter your endpoint URL (must be a valid HTTPS URL)
- Timeout (ms): Set the maximum time (in milliseconds) to wait for a response from your endpoint. Default is 5000ms (5 seconds).
Custom Headers (Optional)
Add custom HTTP headers if your endpoint requires authentication or specific content types:
- Click ”+ Add Header” to add a new header
- Common headers include:
Content-Type:application/json(automatically included)Authorization: For API key or bearer token authentication- Custom headers for your application logic
Step 3: Save and Activate
Click “Create Webhook” to save your configuration. The webhook will immediately start receiving events based on your selected triggers.Webhook Events
Event Types
Sent Event
Triggered when a push notification is successfully sent to a device. Payload Example:Failed Event
Triggered when a push notification fails to be delivered. Payload Example:Response Requirements
Your endpoint should:- Respond with a
2xxstatus code (200-299) to acknowledge receipt - Respond within the configured timeout period
- Return a response as quickly as possible (ideally under 1 second)
Test Webhooks
The webhook management page displays Sent and Failed status counts for each webhook. Click on a webhook to view detailed delivery logs, which can help troubleshoot common failures such as connection timeouts, invalid SSL certificates, non-2xx responses, or connection refusals.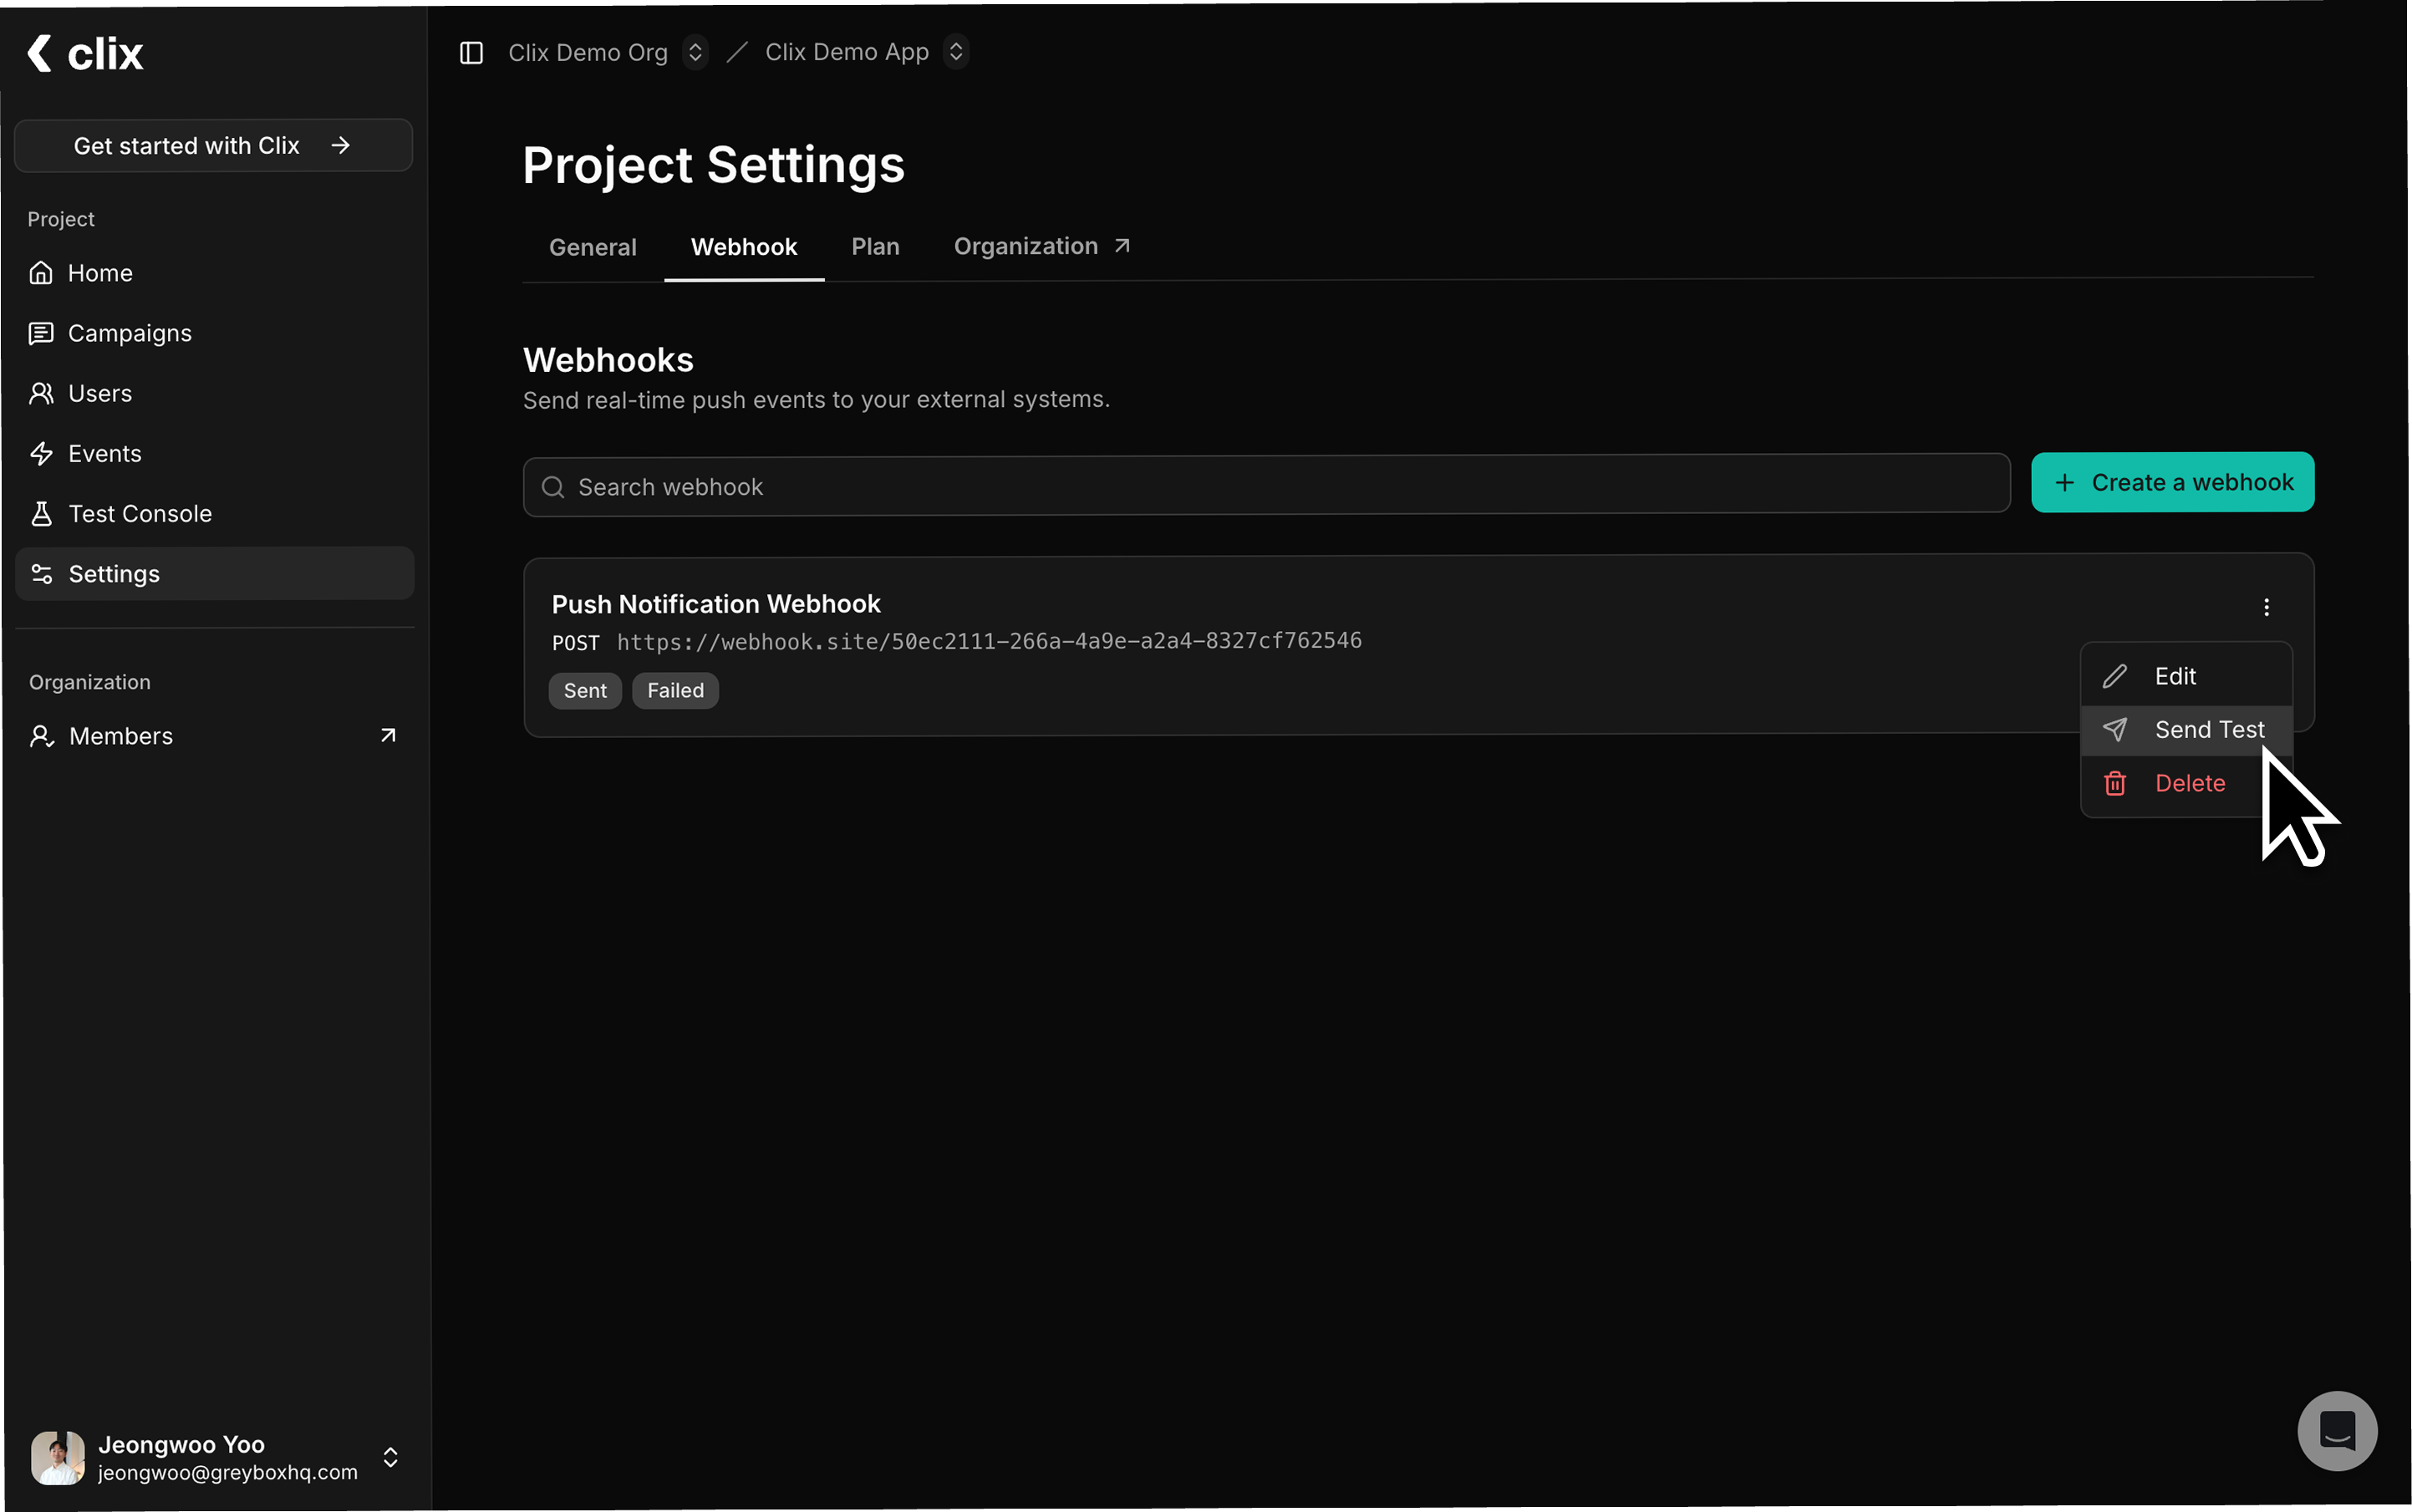
Best Practices
To ensure reliable webhook delivery, use HTTPS endpoints with authentication headers, respond quickly (under 1 second ideally) and process data asynchronously, implement idempotency usingmessage_id to handle duplicates, set appropriate timeouts, log all requests for debugging, and test your configuration thoroughly using tools like webhook.site before going live.